1.4 Creating and Sharing Folders in Google Drive
| Site: | Alma |
| Course: | TRIG Course- Alma College Winter 2015 |
| Book: | 1.4 Creating and Sharing Folders in Google Drive |
| Printed by: | Guest user |
| Date: | Sunday, March 15, 2026, 12:46 AM |
1. Google Drive Introduction

During this course throughout each module, you will be asked to reflect on several questions and write your reflection in a Digital Portfolio.
You will be sharing your Digital Portfolio with Mrs. Thelen (mrsthelen@gmail.com).
Some of you may be very familiar with Google Docs and how to create, copy and share content.
Regardless if you are familiar or not, please read and follow the instructions on the next couple of pages to copy your course Digital Portfolio document.
2. Google Drive
TASK:
First go to http://google.com and sign in. Then click on the Square in the upper right hand corner and the Google Menu will open.

Click on Drive. If you don't have an account, you will want to create one using your school email or create a gmail account.
Google Drive has a FREE suite of tools like Microsoft Office. If you click on Create, you will see Folder, Document, Presentation, Spreadsheet, Form, Drawing
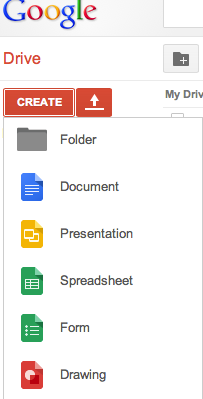
We would like you to create a folder first. Click on Create then Folder. Name the folder Your Name- T3-Digital Portfolio. (e.g. Cassie Thelen-T3-Digital Portfolio) In this folder you will save any documents you create or copy in EDC 370.
For those who are unfamiliar with the tools in Google, we recommend you watch the following tutorials at http://www.gcflearnfree.org/google. 
3. Copying a Document
Google has a neat feature where you can copy a document or template and use it for your own.
TASK:
In this course, we would like you to copy and edit this Digital Portfolio document. It will need to be copied so that it is your own. This document is going to be your Digital Portfolio throughout this course. Once you have copied the template, renamed it, you will throughout the course be asked to add reflections to this document.
To make a copy of a document or template, simply go to File and using the pull down menu choose Make a Copy.
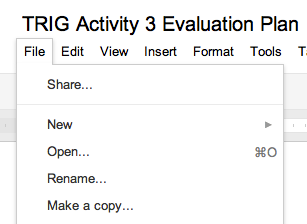
A new copy will open and you will need to rename it (otherwise it will say copy-name of the document). Make sure to add this document to your folder.
Here's how to add or remove something from a folder on Google Drive on the web:
- Check the box next to the title of the item you want to add or remove.
- Click the Folder icon above your list of items.
- To add something to a folder: select the folder where you'd like to move your items.
To remove something from a folder: deselect the folder where an item is currently stored. - Click Apply changes
4. Creating a Document
Once you have your folder you are ready to create a document within that folder. It is important to learn how to create your own documents in Drive as this skill will come in handy when working with Google Drive. Make sure you are in your folder first. (click on the folder)
Next, go to Create and this time click on Document. The document will open and you will see familiar word processing tools such as File, Edit, View, Insert, Format, Tools, Table, Help. You can also change your font, font size, color, bold, italicize, etc.
_______________________________________________________________________________

_______________________________________________________________________________
Make sure to name your document by mousing over the words Untitled Document in the upper left-hand corner and replacing it with a name for your document. As you begin typing in your document, it automatically saves!
5. Sharing your T3 Folder and Documents
Another neat feature in Google Drive is the ability to share your documents with others. You will need to share your T3 folder with Mrs. Thelen (mrsthelen@gmail.com).
TASK:
To share a folder, you select from the list of folders on the left hand side.
1. In the main part of the window, click the check box of your folder.
2. Click Share and then Sharing settings... from the drop down menu.
3. Add a collaborator by email entering their email in the text box labeled Add people:.
4. Set them to Can edit since you want to be able to work collaboratively with them.
5. Click Share. They will receive an email immediately with an invitation to work with you on the document.
6. Once you have shared a folder, the contents are shared automatically with those who have rights to the folder.

6. What's Next?
You have learned how to navigate Moodle and the T3 Course. If you needed assistance with Google you have also learned how to create and share folders and documents.
Now the last part of this Module is to test your typing skills! We are going to introduce valuable practice sites for your students to practice their typing skills.
You are now ready to move on to the next activity: 1.5 Typing Activities